Printer Density and Print Speed Adjustment Guide (for Mobile App, macOS, Windows, Chromebook, Linux)
For mobile apps:
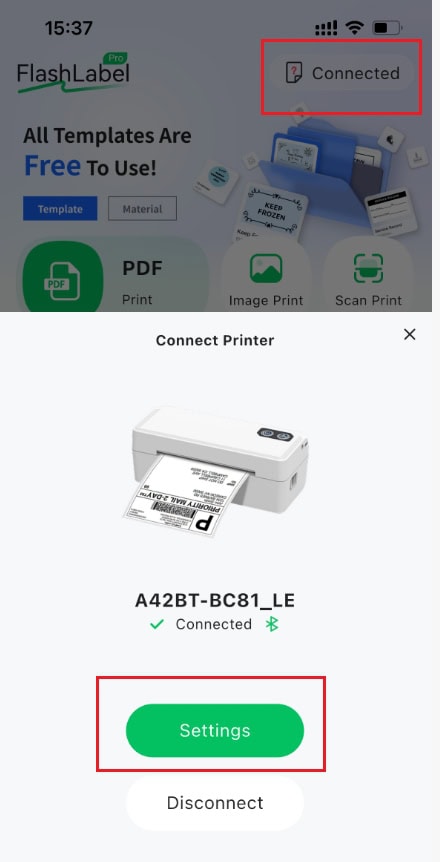
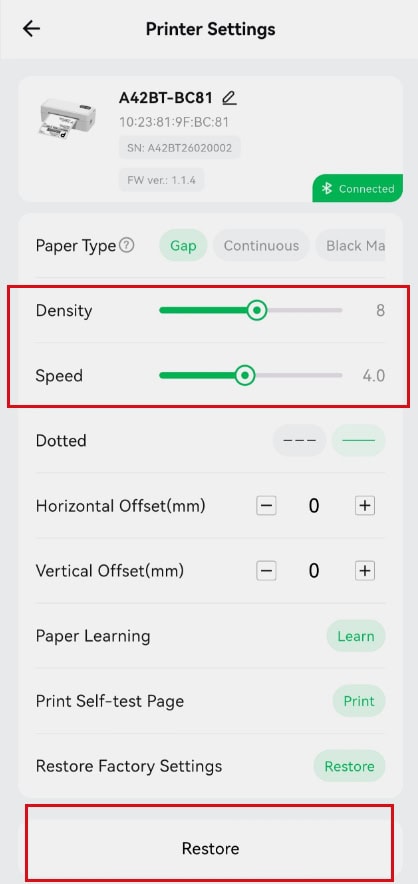
After connecting the printer, click “Settings” to enter the “Printer Settings” interface. Adjust the printer density and speed. If you want to restore the default settings, you can click “Restore“.
For Windows:
Enter the settings interface:
Click Settings → Bluetooth & devices → Printers & Scanners → Click “Arrvel A42BT” → Printing Preferences → Page Setup.
Adjust the speed and concentration, then click “OK“.
Please follow these steps to set it up:
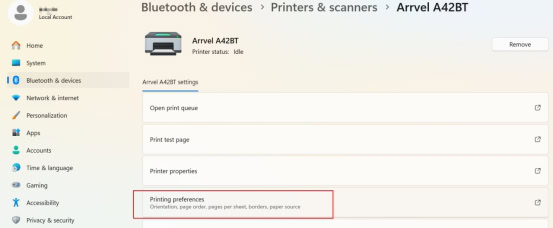
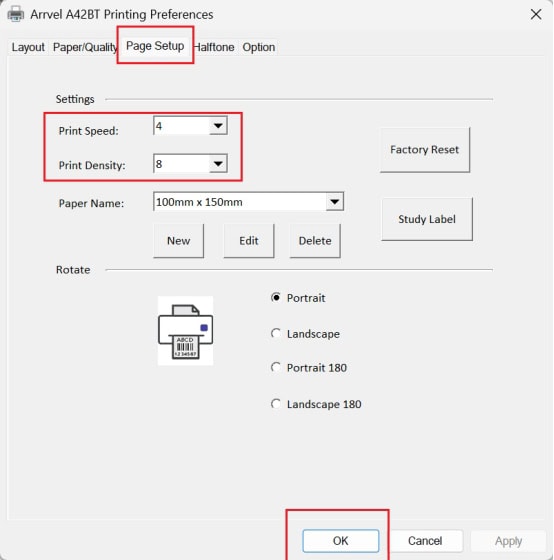
Please adjust the darkness and speed according to your printing needs, and then click “OK” to save your settings.
For Mac:
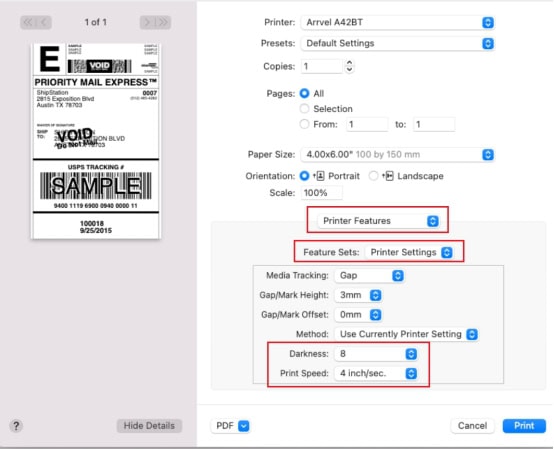
On the print preview page, click Printer Options → Printer Features → Printer Settings. Adjust the speed and density, then click “OK“. (Note: The page layout may vary slightly between different Mac versions, but the speed and density adjustments are all made in the printer settings.)
For Chromebook:
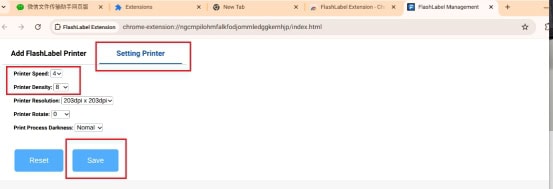
In the printer settings interface, adjust the speed and density, and then click save.
For Linux:
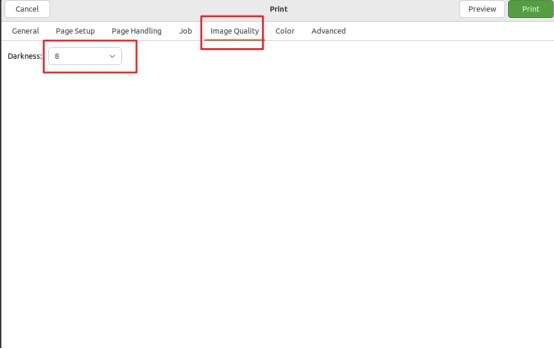
Adjust print density in the “Image Quality” section of the print page, and adjust print speed in the “Advanced” section.